|
|
|
|
Plant Markers:
How to Make Them, Part Six -
Attaching Beads
Beads have a hole through the middle, which makes them easier to work
with, and the results look even more like jewelry.
|
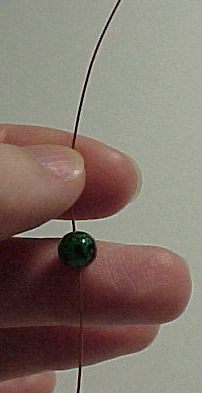
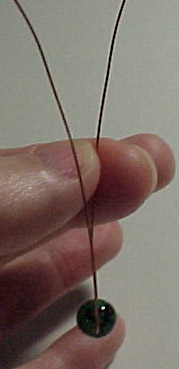
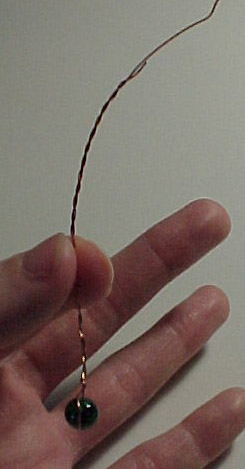
Steps 1-3: Using a single strand of wire
about one foot long, pass the end through the bottom bead in the
series. At the half-way point, fold the wire back up. Twist the
two strands around each other tightly all the way up.
|
|
|
|
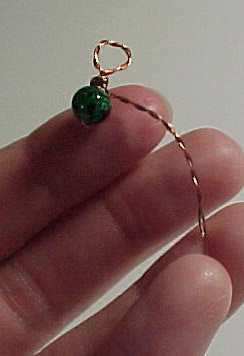
Step 4: Form the twisted wire into a loop,
wrap it around itself, and cut off the excess. Put something round
through the loop until it tightens and becomes nice and round.
|
|
|
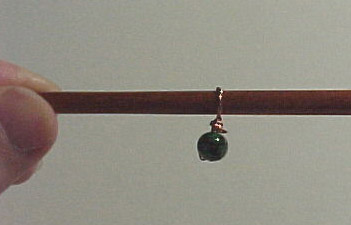
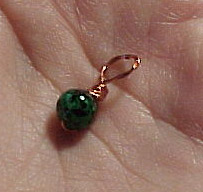
Now you have a terminal bead with a round loop on it.
|
|
|
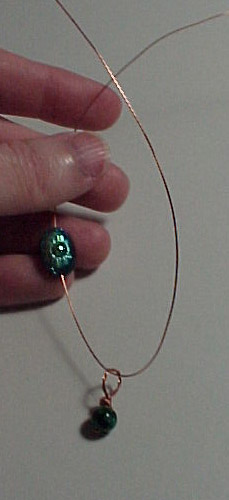
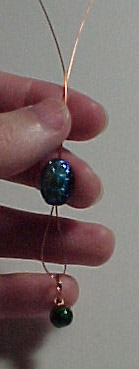
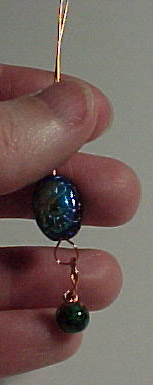
Steps 5-7: Take the next bead in the series
and another foot-long single strand of wire. Pass the wire through the
bead, through the loop on th eterminal bead, and back up through the second
bead. Pull the wire up tight.
|
|
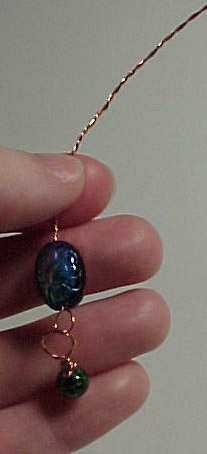
Steps 8-10: Put something round, like the
nose of round-nose pliers, through the new loop at the bottom of the second
bead so the loop becomes nice and round. Twist the two strands of
wire at the top of the second bead together all the way up to form a loop
at the top as before and cut off the excess wire. Now you have a
lovely "string" of beads started. Add more beads if desired
by repeating steps 5-9. Attach to a main tile as before.
|
|
 
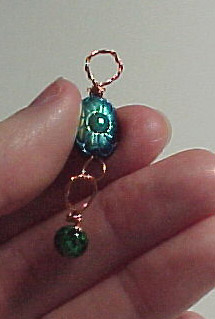
Finished markers with beads attached.
Hang your markers in more substantial plants as jewelry, like a necklace,
twisting the ends of the wire around themselves and inside the loop formed so
you don't end up with a long piece of thick wire sticking out. Also, be
sure to give the plant plenty of growing room - do not strangle the
branches!
|
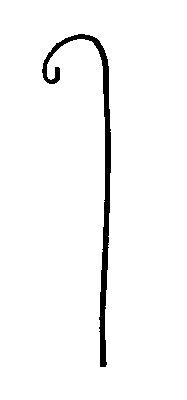
If the plant does not have such branches, cut and shape
a wire coat hanger to form a rounded "stem" with a hook on the
end to hang the marker from, and stick the stem into the ground in front of
the plant.
|
|
Needlenose pliers work well to form the hook, while the
rounded top can be done by hand or with regular pliers. Heavier wire
cutters are needed to cut a coat hanger, but most people have these in
their toolboxes, and some pliers have this feature built in.
|
That's it! Once you get the hang of it, a single marker can take
from 5 to 20 minutes to make, depending on how elaborate you want to
get. Some tiles look best simply wrapped in two corners, without anything
attached.
I hope this has given you ideas for your own garden. Have fun!
Top
Home ** What's New? ** How It All Started
* Garden Update October 2004 * Garden
Diary 2008 * Garden Diary 2009 * Garden Diary 2010 * Garden
Diary 2011 ** New! Garden Diary 2012
** Rose and Perennial Court * Rose Update Feb 2003 * Front Garden Update 2008-9 * Behind the Wall * Herb Circle * Tropical Edibles
Area ** New! Growing
Dinner: Visit to a Homegarden ** Potager
* Potager 2004-5 * Potager Plan
2008-9 * Edibles 2008-9 * Crop Chart
2008-9 * Edibles
Planting Schedule * Warm Season Planting 2005 * Succulent Beds * Wild Edibles *
Caterpillars to Butterflies * Building Healthy Soil
* Ecological Gardening
* Index of Plants and Techniques Featured * Annual Vegetable Chart * Long Lasting Markers: Jewelry for Your Plants * Build a Gardening Notebook
|
|